> ## Documentation Index
> Fetch the complete documentation index at: https://polar.sh/docs/llms.txt
> Use this file to discover all available pages before exploring further.
# OAuth 2.0 Connect
## Authorize
To start the authorization flow you need to redirect the user to the authorization URL. It looks like this:
```
https://polar.sh/oauth2/authorize?
response_type=code
&client_id=CLIENT_ID
&redirect_uri=https%3A%2F%2Fexample.com%2Fcallback
&scope=openid%20email
```
The parameters are the one described in the [OpenID Connect specification](https://openid.net/specs/openid-connect-core-1_0.html#AuthRequest). The most important ones are:
Indicates that you want to use the authorization code flow. Most common and
the only one supported by Polar.
The Client ID you got when creating the OAuth 2.0 client.
The URL where the user will be redirected after granting access to their data.
Make sure you declared it when creating the OAuth2 client.
A space-separated list of scopes you want to ask for. Make sure they are part
of the scopes you declared when creating the OAuth2 client.
If you redirect the user to this URL, they'll see a page asking them to grant access to their data, corresponding to the scopes you asked for.
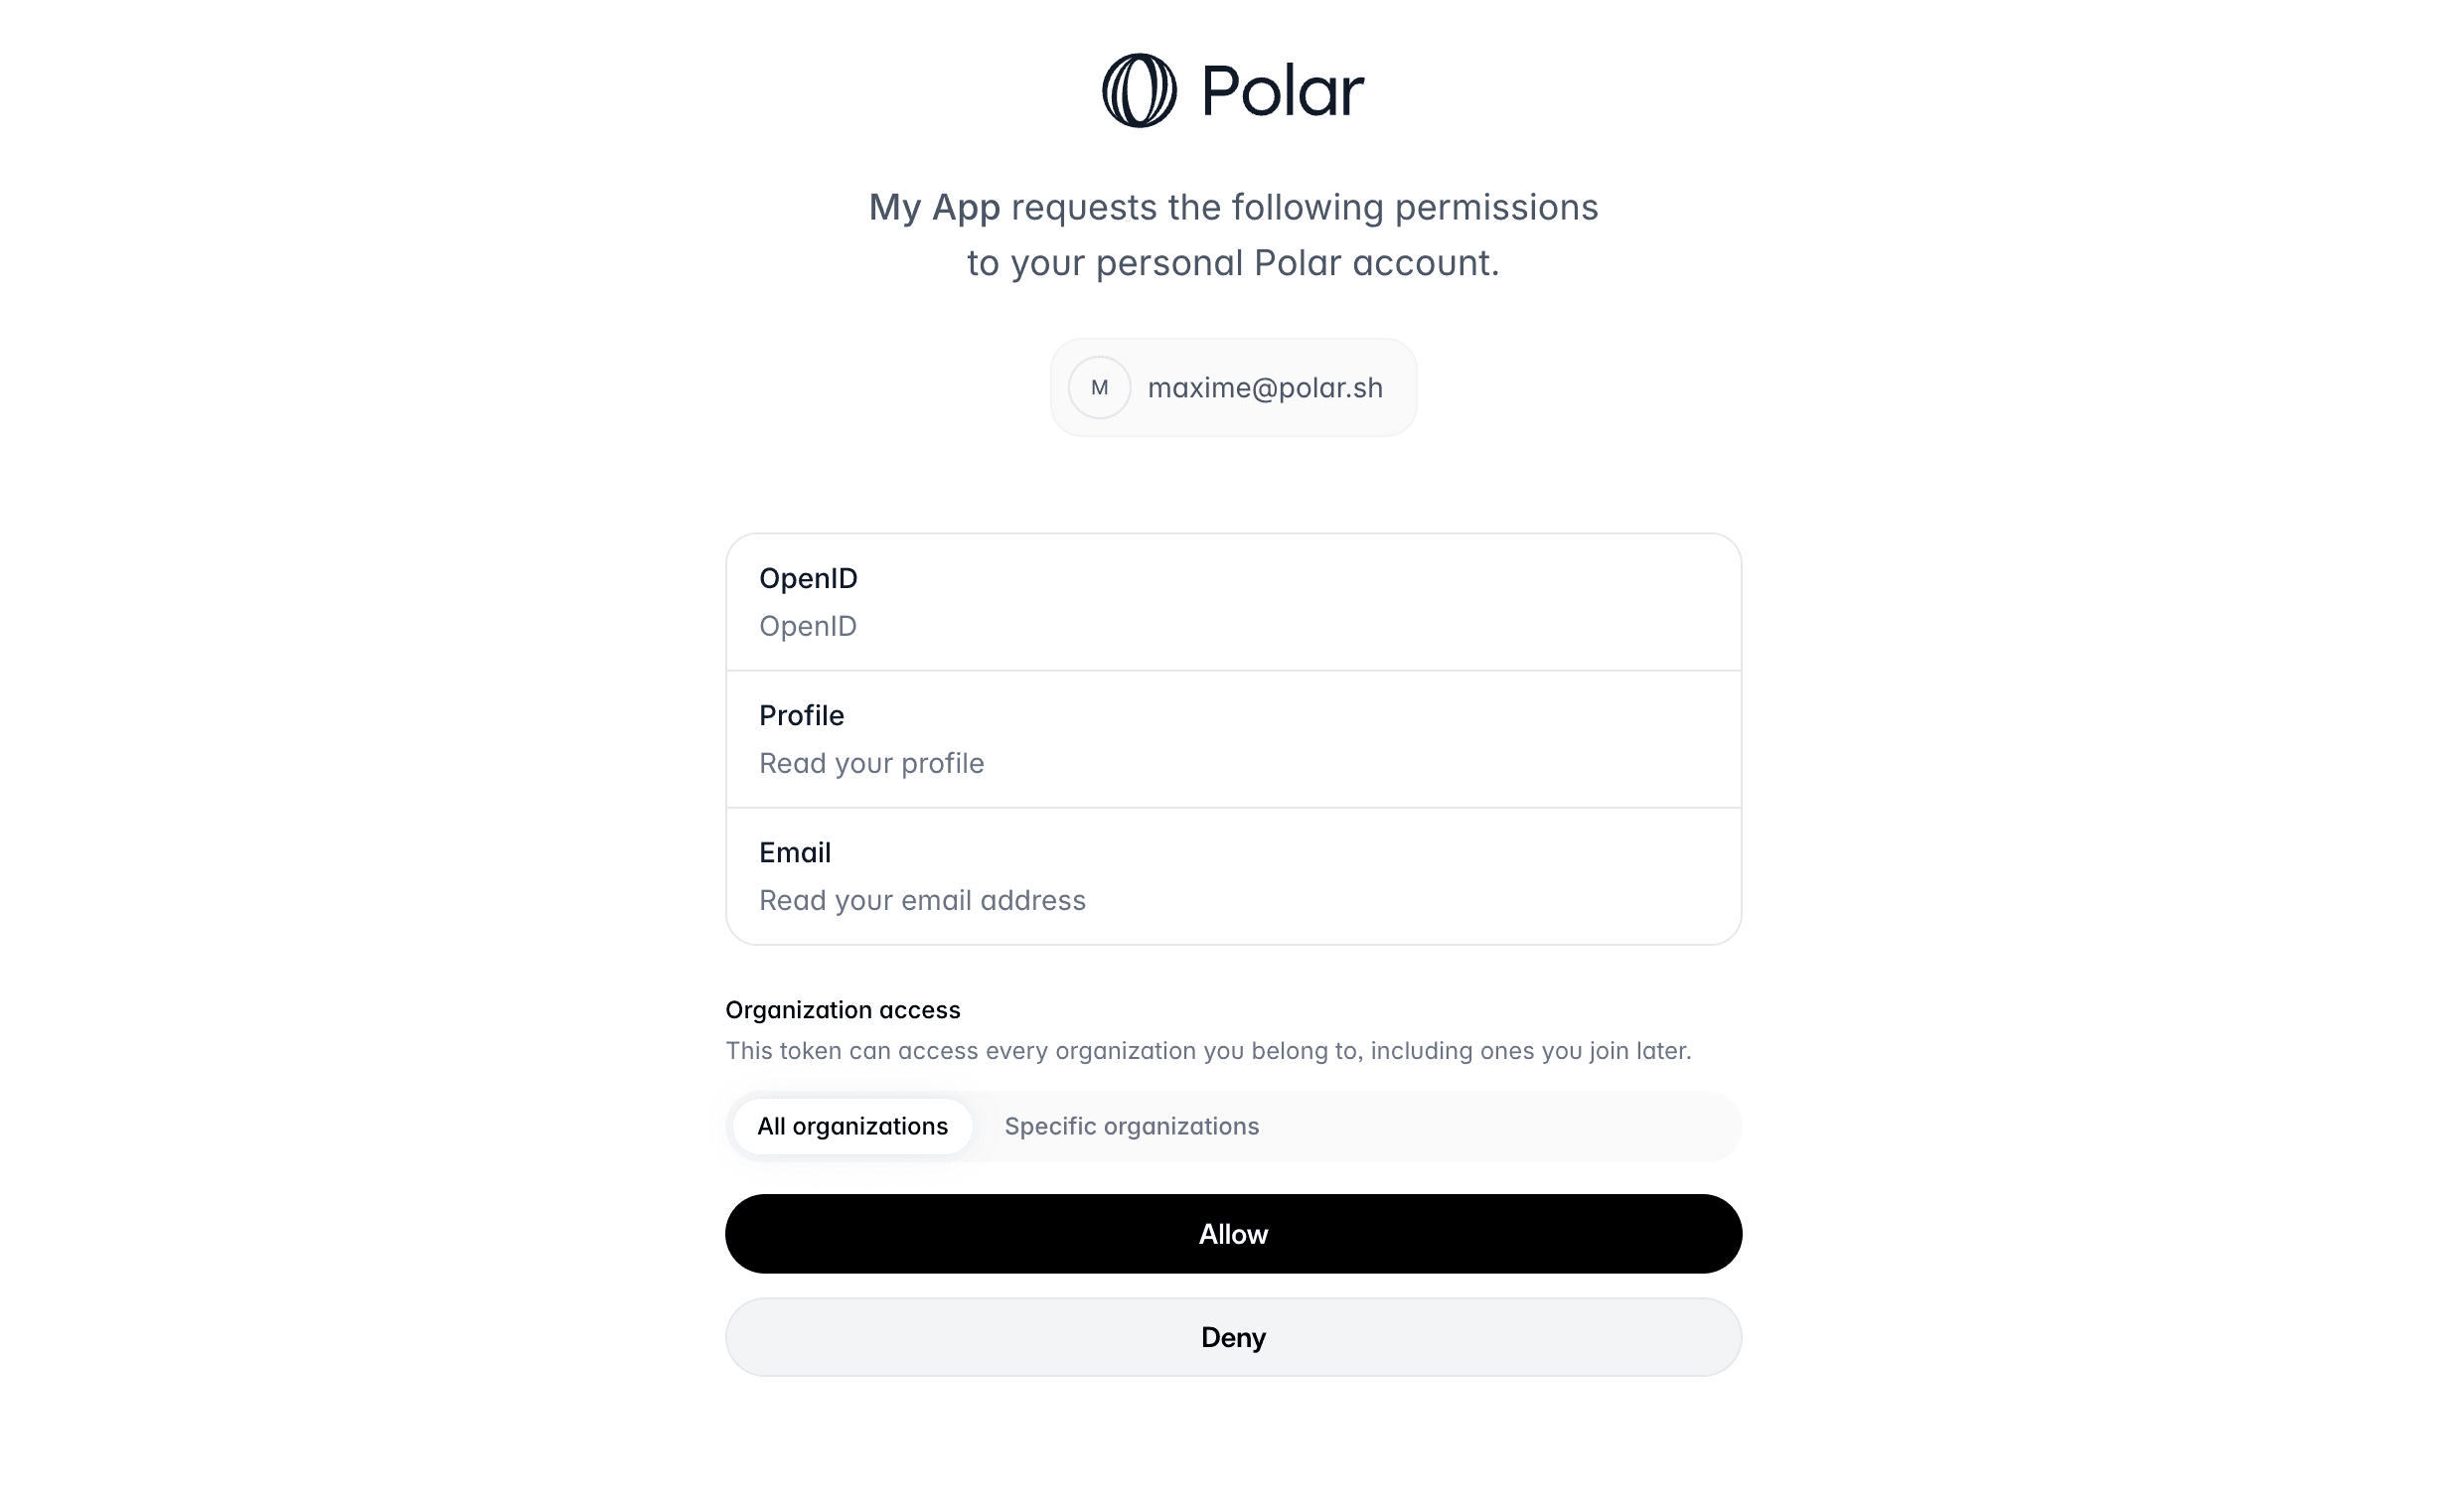 Polar issues **user-scoped** access tokens, tied to the user granting access. On the consent screen, the user can optionally **limit the token to specific organizations**: by default it can access all of their organizations (including ones they join later), but if they select specific ones, it's restricted to those. Access always intersects with the user's current membership, so it adjusts automatically if they leave an organization. You can check which organizations a token is limited to by [introspecting it](/api-reference/oauth2/connect/introspect-token) — the response includes an `organizations` array (an empty array means all of them).
If the user grants access, they'll be redirected to your `redirect_uri` with a `code` parameter in the query string. This code is a one-time code that you can exchange for an access token.
#### Exchange code token
Once you have the authorization code, you can exchange it for an access token. To do so, you'll need to make a `POST` request to the token endpoint. This call needs to be authenticated with the Client ID and Client Secret you got when creating the OAuth2 client.
Here is an example with cURL:
```bash Terminal theme={null}
curl -X POST https://api.polar.sh/v1/oauth2/token \
-H 'Content-Type: application/x-www-form-urlencoded' \
-d 'grant_type=authorization_code&code=AUTHORIZATION_CODE&client_id=CLIENT_ID&client_secret=CLIENT_SECRET&redirect_uri=https://example.com/callback'
```
You should get the following response:
```json theme={null}
{
"token_type": "Bearer",
"access_token": "polar_at_XXX",
"expires_in": 864000,
"refresh_token": "polar_rt_XXX",
"scope": "openid email",
"id_token": "ID_TOKEN"
}
```
The `access_token` will allow you to make authenticated API requests on behalf of the user. The `refresh_token` is a long-lived token that you can use to get new access tokens when the current one expires. The `id_token` is a signed JWT token containing information about the user, as per the [OpenID Connect specification](https://openid.net/specs/openid-connect-core-1_0.html#IDToken).
#### Public Clients
Public clients are clients where the Client Secret can't be kept safe, as it would be accessible by the final user. This is the case for SPA, mobile applications, or any client running on the user's device.
In this case, **and only if the client is configured as a Public Client**, the request to the token endpoint won't require the `client_secret` parameter. However, the [PKCE](https://oauth.net/2/pkce/) method will be required to maximize security.
### Make authenticated requests
Once you have an access token, either from a Personal Access Token or from the OpenID Connect flow, you can make authenticated requests to the API. Here is a simple example with cURL:
```bash Terminal theme={null}
curl -X GET https://api.polar.sh/v1/oauth2/userinfo \
-H 'Authorization: Bearer polar_at_XXX'
```
Polar issues **user-scoped** access tokens, tied to the user granting access. On the consent screen, the user can optionally **limit the token to specific organizations**: by default it can access all of their organizations (including ones they join later), but if they select specific ones, it's restricted to those. Access always intersects with the user's current membership, so it adjusts automatically if they leave an organization. You can check which organizations a token is limited to by [introspecting it](/api-reference/oauth2/connect/introspect-token) — the response includes an `organizations` array (an empty array means all of them).
If the user grants access, they'll be redirected to your `redirect_uri` with a `code` parameter in the query string. This code is a one-time code that you can exchange for an access token.
#### Exchange code token
Once you have the authorization code, you can exchange it for an access token. To do so, you'll need to make a `POST` request to the token endpoint. This call needs to be authenticated with the Client ID and Client Secret you got when creating the OAuth2 client.
Here is an example with cURL:
```bash Terminal theme={null}
curl -X POST https://api.polar.sh/v1/oauth2/token \
-H 'Content-Type: application/x-www-form-urlencoded' \
-d 'grant_type=authorization_code&code=AUTHORIZATION_CODE&client_id=CLIENT_ID&client_secret=CLIENT_SECRET&redirect_uri=https://example.com/callback'
```
You should get the following response:
```json theme={null}
{
"token_type": "Bearer",
"access_token": "polar_at_XXX",
"expires_in": 864000,
"refresh_token": "polar_rt_XXX",
"scope": "openid email",
"id_token": "ID_TOKEN"
}
```
The `access_token` will allow you to make authenticated API requests on behalf of the user. The `refresh_token` is a long-lived token that you can use to get new access tokens when the current one expires. The `id_token` is a signed JWT token containing information about the user, as per the [OpenID Connect specification](https://openid.net/specs/openid-connect-core-1_0.html#IDToken).
#### Public Clients
Public clients are clients where the Client Secret can't be kept safe, as it would be accessible by the final user. This is the case for SPA, mobile applications, or any client running on the user's device.
In this case, **and only if the client is configured as a Public Client**, the request to the token endpoint won't require the `client_secret` parameter. However, the [PKCE](https://oauth.net/2/pkce/) method will be required to maximize security.
### Make authenticated requests
Once you have an access token, either from a Personal Access Token or from the OpenID Connect flow, you can make authenticated requests to the API. Here is a simple example with cURL:
```bash Terminal theme={null}
curl -X GET https://api.polar.sh/v1/oauth2/userinfo \
-H 'Authorization: Bearer polar_at_XXX'
```